Header image

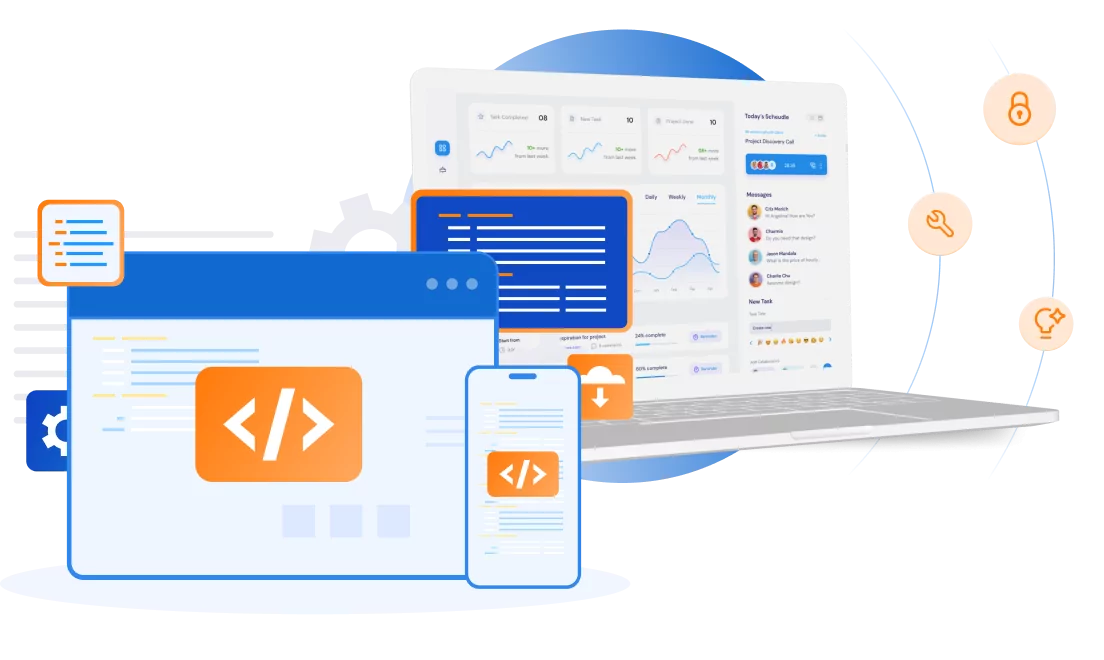
What makes mobile apps slow (and how to speed them up)

17/01/2023

696

It’s no secret that people are always on their phones. If they are not on a social networking app, they’re shopping, gaming, you name it. On average, mobile phone users check their devices 63 times every day. In addition, Americans use their cell phones for 5.4 hours every day on average. This is excellent news for anyone developing an app or considering doing so.

However, your app development endeavors will be met with lots of competition. If you want to increase the chances of your app standing out and gaining popularity, you have to ensure that it is fast. Human beings are not inherently patient. With the advancement in technology, they expect maximum speed from all the apps on their phone. According to Apteligent, a mobile app performance specialist, 48% of users will remove or abandon an app if they have to wait longer than two seconds for it to launch.

Keep reading this article if your app is slow and you need answers. We will discuss the different issues that make mobile apps slow and how you can speed them up for user satisfaction.

1.    Running outdated software versions

App performance will gradually deteriorate if your application uses outdated frameworks and software or has not been upgraded to newer versions in a while. This is because older software versions cannot use more unique features, including improved compiler optimizations and higher community engagement and support. When newer iPhones are released, you’ll notice more users complaining about their phones significantly slowing down.

Solution

Take a closer look at your technology stack and identify any software that still needs to be upgraded to the most recent version. As a rule, the latest versions feature greater compatibility and improved functionality. They provide far better performance and offer more stability. In addition, they are typically embedded with various enhancements that can immediately increase the speed and efficiency of your app, from improved tuning tweaks to security alerts and bug fixes.

2.    Connectivity issues

As a developer, you can do little about connectivity issues. It is up to the app user to switch to a better cellular network provider or find a more robust and stable Wi-Fi connection.

However, you can make some internal changes to your app to allow it to run more efficiently even when connected to a poor network.

There are two possible solutions:

Solution:

Using a Content Delivery Network

Whether you are using a web application or a mobile app, a content delivery network (CDN) can significantly enhance your app’s performance. A CDN utilizes multiple servers located all over the world to distribute content quickly and efficiently to visitors. This strategy is highly effective because users receive content from the server that is physically nearest to them.

Load data as requested

A mobile app often handles enormous amounts of data daily. As a result, loading a large amount of data simultaneously will slow down the app because it is trying to process many requests simultaneously. It would be best to load the data as needed to remedy this. On the other hand, you can opt to divide it into smaller chunks. You’ll need separate assemblies to achieve this. Alternatively, you can load textual data first and image-based content later.

3.    Too much data

It goes without saying that if your app is overloaded with data, it will take longer to load. However, this does not mean you can delete the chunks of data and make your program lighter. For one, you might have to sacrifice valuable features that make your app unique.

Solution:

Data compression

Compressing data helps speed up loading without sacrificing the attractiveness or functionality of audio components, vivid images, and video content. Compression is a powerful tool that can dramatically accelerate your app’s speed. 

Data compression takes two forms:

 Lossless compression: As the name suggests, content like text and spreadsheets are compressed without losing data. This method allows you to restore a file to its original size without losing data.

Lossy compression: Although chunks of data are lost in this method, app users are unaware of it. It is excellent for compressing images, audio, and video.

Note: For better performance, you can cache some photos and compress them so you don’t have to load them repeatedly whenever a user requests them.

4.    Server issues

One of the most frequent causes of delayed apps is typically a server issue. When a user acts as the app, the server performs multiple functions. For example, it executes application code, communicates with thousands of other users, retrieves data from its memory, and rotates between a variety of tasks. Because of the multitude of actions, your server is overwhelmed.

As a result, it could run out of memory or process requests slowly to prevent it from shutting down. As a result, it delays processing a few requests while others wait to be processed.

As complex as this sounds, several viable solutions can fix slow servers.

Solution:

  • Integrating a reserve proxy server

Taking some of the strain off your server could help it function quickly and accommodate more requests. In addition, you can outsource some server functions by incorporating a reverse proxy server.

A reverse proxy server sits before the device and manages internal flow/traffic. It can do this easily because it is directly connected to the internet, giving it the power to interact with the server via a significantly quicker internal system.

As a result, the application server can perform other actions, load pages and send them to the reverse proxy server. The reverse server, in turn, waits for the user’s instructions and passes on the ready pages. A reverse proxy server enables your app to operate at benchmark speeds while maintaining optimum performance.

  • Use a load balancer

In some apps, multiple minor servers are used instead of a single large one. In this case, it is advised to incorporate a load balancer. A load balancer is a software tool that evenly distributes the load across the servers to maintain a low response time.

In addition, a load balancer supports SSL termination and static file caching. If you are still determining which load balancer would be best for your app, specialists recommend sticking with the option available on your cloud platform.

Wrapping up

Maximizing your app’s performance is in your best interest. For one, there are established quality standards you must meet. In addition, speed directly impacts user experience and whether they will stick with or dump your app.

If you still need to figure out what’s slowing down your app, you can contact a mobile app development business and ask for a performance audit to double-check whether everything is in order.

We at Supreme Tech are available for a free consultation. We are an outsourcing IT company focusing on mobile and web apps for English-speaking clients. We build and maintain the products using the agile methodology based on the client’s demands.

Related Blog

Sparking the Fire, Spreading the Passion

Our culture

+0

    Sparking the Fire, Spreading the Passion

    At SupremeTech, we believe growth isn’t something that happens in isolation. True success lies in helping others rise and evolve alongside you. That's why we call it "Sparking the Fire, Spreading the Passion". When Quang Hai joined SupremeTech five years ago, he was a young professional just beginning his career. He brought with him a curious mind and an eagerness to learn, though like many new hires, he faced a steep learning curve. d. Like many beginners, he faced challenges and had a lot to learn. Luckily, he had a mentor to supported him, gave honest feedback, solved problems together, and always believed in his potential. This journey was not just about learning new skills. It was about growing, building confidence, and sharing that growth with others. We talked with Mr. Duc Tai, the mentor who supported Hai from the beginning, and with Quang Hai, who is now ready to guide the next generation. Their stories show how one person’s support can help light a spark that keeps on spreading. Sharing From the Mentor - Mr. Duc Tai What made you believe Hai had the potential to go far? Mr. Tai: Right from the start, Hai showed that he could think clearly and always tried to understand problems deeply. He didn’t just fix things on the surface. He wanted to solve the real issue so that everything could work better in the long run. He was calm, listened well, and focused on finding solutions instead of complaining. He was also very responsible. I never had to worry about the tasks I gave him. When assigning roles, do you prioritize short-term results or long-term development? Mr. Tai: I always lean toward long-term growth. If someone is in a role where they feel both challenged and supported, the results will naturally follow, and they’ll last longer. It's not just about getting things done today but building a foundation that sustains growth in the future. What do you find to be the most challenging part of being a manager? Mr. Tai: It’s finding the right place for each person. I spend a lot of time watching and thinking about how people work. When someone is in a role that suits them, they can grow at their own pace, and the entire team becomes stronger. From the Mentee Turned Mentor - Quang Hai When you first became a leader, what were you afraid of? Hai: When I was first given a leadership position, I felt nervous and unsure of myself. I wondered if I was ready and if I could earn my teammates’ trust while I still had so much to learn. Later, I realized that being a leader doesn’t mean you have to be perfect. What matters is being there for your team, being willing to listen, taking responsibility, and continuing to learn. What is the most valuable lesson you’ve learned from Mr. Tai? Hai: I learned always to be ready to take on responsibility. Mr. Tai never says no to a task, whether it comes from the company or the team. He always takes action and faces problems directly. That attitude showed me that if you want to grow, you have to step out of your comfort zone and keep moving forward. Now that you're guiding others, when do you feel you’ve truly grown? Hai: I see it in the way I listen and ask questions. I used to think a mentor had to provide all the answers. But now I know that helping someone means guiding them to find their own answers. I often ask, “What do you think?” or “What’s making this hard for you?” To me, growth isn’t about being the most knowledgeable person in the room. It’s about walking alongside others and helping them grow in their own unique way. Final thought Quang Hai’s journey is more than a story of personal development. It reflects the broader spirit at SupremeTech—a place where everyone is given the opportunity to learn, face challenges, and eventually pass on their knowledge to the next wave of talent. His transformation from mentee to mentor is living proof that when someone is nurtured with care and trust, they can grow strong enough to lift others as well. Because at SupremeTech, growth is never just about one person. And as long as we continue to support and inspire each other, the fire will never go out. >>> Read more: From Seeking The Path to Leading The Way: Phuoc’s Journey at SupremeTechAnh Duong – A Journey of Rising Above to Shine Bright

    09/07/2025

    104

    Our culture

    +0

      Sparking the Fire, Spreading the Passion

      09/07/2025

      104

      How-to

      Knowledge

      +0

        Level Up Your Code: Transitioning to Validated Environment Variables

        Validated Environment variables play a critical role in software projects of all sizes. As projects grow, so does the number of environment variables—API keys, custom configurations, feature flags, and more. Managing these variables effectively becomes increasingly complex. If mismanaged, they can lead to severe bugs, server crashes, and even security vulnerabilities.  While there’s no one-size-fits-all solution, having some structure in how we manage environment variables can really help reduce mistakes and confusion down the road. In this article, I’ll share how I’ve been handling them in my own projects and what’s worked well for me so far. My Personal Story When I first started programming, environment variables were a constant source of headaches. I often ran into problems like: Misspelled variable names.Failure to retrieve variable values, even though I was sure they were set.Forgetting to define variables entirely, leading to runtime errors. These issues were tricky to detect. Typically, I wouldn’t notice anything was wrong until the application misbehaved or crashed. Debugging these errors was tedious—tracing back through the code to find that the root cause was a missing or misconfigured environment variable. For a long time, I struggled with managing environment variables. Eventually, I discovered a more effective approach: validating all required variables before running the application. This process has saved me countless hours of debugging and has become a core part of my workflow. Today, I want to share this approach with you. A Common Trap in Real Projects Beyond personal hiccups, I’ve also seen issues arise in real-world projects due to manual environment handling. One particular pitfall involves relying on if/else conditions to set or interpret environment variables like NODE_ENV. For example: if (process.env.NODE_ENV === "production") { // do something } else { // assume development } This type of conditional logic can seem harmless during development, but it often leads to incomplete coverage during testing. Developers typically test in development mode and may forget or assume things will "just work" in production. As a result, issues are only discovered after the application is deployed — when it's too late. In one of our team’s past projects, this exact scenario caused a production bug that slipped through all local tests. The root cause? A missing environment variable that was only required in production, and the conditional logic silently skipped it in development. This highlights the importance of failing fast and loudly—ideally before the application even starts. And that’s exactly what environment variable validation helps with. The Solution: Validating Environment Variables The secret to managing environment variables efficiently lies in validation. Instead of assuming all necessary variables are correctly set, validate them at the application’s startup. This prevents the application from running in an incomplete or misconfigured state, minimizing runtime errors and improving overall reliability. Benefits of Validating Environment Variables Error Prevention: Catch missing or misconfigured variables early.Improved Debugging: Clear error messages make it easier to trace issues.Security: Ensures sensitive variables like API keys are set correctly.Consistency: Establishes a standard for how environment variables are managed across your team. Implementation Here’s a simple and structured way to validate environment variables in a TypeScript project. Step 1: Define an Interface Define the expected environment variables using a TypeScript interface to enforce type safety. export interface Config { NODE_ENV: "development" | "production" | "test"; SLACK_SIGNING_SECRET: string; SLACK_BOT_TOKEN: string; SLACK_APP_TOKEN: string; PORT: number; } Step 2: Create a Config Loader Write a function to load and validate environment variables. This loader ensures that each variable is present and meets the expected type or format. Step 3: Export the Configuration Use the config loader to create a centralized configuration object that can be imported throughout your project. import { loadConfig } from "./loader"; export const config = loadConfig(); Conclusion Transitioning to validated environment variables is a straightforward yet powerful step toward building more reliable and secure applications. By validating variables during startup, you can catch misconfigurations early, save hours of debugging, and ensure your application is always running with the correct settings.

        09/07/2025

        68

        Bao Dang D. Q.

        How-to

        +1

        • Knowledge

        Level Up Your Code: Transitioning to Validated Environment Variables

        09/07/2025

        68

        Bao Dang D. Q.

        How-to

        Knowledge

        +0

          Build Smarter: Best Practices for Creating Optimized Dockerfile

          If you’ve been using Docker in your projects, you probably know how powerful it is for shipping consistent environments across teams and systems. It's time to learn how to optimize dockerfile. But here’s the thing: a poorly written Dockerfile can quickly become a hidden performance bottleneck. Making your images unnecessarily large, your build time painfully slow, or even causing unexpected behavior in production. I’ve seen this firsthand—from early projects where we just “made it work” with whatever Dockerfile we had, to larger systems where the cost of a bad image multiplied across services. My name is Bao. After working on several real-world projects and going through lots of trial and error. I’ve gathered a handful of practical best practices to optimize Dockerfile that I’d love to share with you. Whether you’re refining a production-grade image or just curious about what you might be missing. Let me walk you through how I approach Docker optimization. Hopefully it’ll save you time, headaches, and a few docker build rage moments 😅. Identifying Inefficiencies in Dockerfile: A Case Study Below is the Dockerfile we’ll analyze: Key Observations: 1. Base Image: The Dockerfile uses ubuntu:latest, which is a general-purpose image. While versatile, it is significantly larger compared to minimal images like ubuntu:slim or Node.js-specific images like node:20-slim, node:20-alpine. 2. Redundant Package Installation: Tools like vim, wget, and git are installed but may not be necessary for building or running the application. 3. Global npm Packages: Pages like nodemon, ESLint, and prettier are installed globally. These are typically used for development and are not required in a production image. 4. Caching Issues: COPY . . is placed before npm install, invalidating the cache whenever any application file changes, even if the dependencies remain the same. 5. Shell Customization: Setting up a custom shell prompt (PS1) is irrelevant for production environments, adding unnecessary steps. 6. Development Tool in Production: The CMD uses nodemon, which is a development tool, to run the application Optimized your Docker Image Here’s how we can optimize the Dockerfile step by step. Showing the before and after for each section with the result to clearly distinguish the improvements. 1. Change the Base Image Before: FROM ubuntu:latest RUN apt-get update && apt-get install -y curl && curl -fsSL https://deb.nodesource.com/setup_20.x | bash - && \ apt-get install -y nodejs Use ubuntu:latest, a general-purpose image that is large and includes many unnecessary tools. After: FROM node:20-alpine Switches to node:20-alpine, a lightweight image specifically tailored for Node.js applications. Result: With the first change being applied, the image size is drastically reduced by about ~200MB.  2. Simplify Installed Packages Before: RUN apt-get update && apt-get install -y \ curl \ wget \ git \ vim \ python3 \ make \ g++ && \ curl -fsSL https://deb.nodesource.com/setup_20.x | bash - && \ apt-get install -y nodejs Installs multiple tools (curl, wget, vim, git) and Node.js manually, increasing the image size and complexity. After: RUN apk add --no-cache python3 make g++ Uses apk (Alpine’s package manager) to install only essential build tools (python3, make, g++). Result: The image should be cleaner and smaller after removing the unnecessary tools, packages. (~250MB vs ~400MB with the older version) 3. Leverage Dependency Caching Before: COPY . . RUN npm install Copies all files before installing dependencies, causing cache invalidation whenever any file changes, even if dependencies remain unchanged. After: COPY package*.json ./ RUN npm install --only=production COPY . . Copies only package.json and package-lock.json first, ensuring that dependency installation is only re-run when these files change.Installs only production dependencies (--only=production) to exclude devDependencies. Result: Faster rebuilds and a smaller image by excluding unnecessary files and dependencies. 4. Remove Global npm Installations Before: RUN npm install -g nodemon eslint pm2 typescript prettier Installs global npm packages (nodemon, eslint, pm2, ect.) that are not needed in production, increasing image size. After: Remove Entirely: Global tools are omitted because they are unnecessary in production. Result: Reduced image size and eliminated unnecessary layers. 5. Use a Production-Ready CMD Before: CMD ["nodemon", "/app/bin/www"] Uses nodemon, which is meant for development, not production. Result: A streamlined and efficient startup command. 6. Remove Unnecessary Shell Customization Before: ENV PS1A="💻\[\e[33m\]\u\[\e[m\]@ubuntu-node\[\e[36m\][\[\e[m\]\[\e[36m\]\w\[\e[m\]\[\e[36m\]]\[\e[m\]: " RUN echo 'PS1=$PS1A' >> ~/.bashrc Sets and applies a custom shell prompt that has no practical use in production After: Remove Entirely: Shell customization is unnecessary and is removed. Result: Cleaner image with no redundant configurations or layers. Final Optimized Dockerfile FROM node:20-alpine WORKDIR /app RUN apk add --no-cache python3 make g++ COPY package*.json ./ RUN npm install --only=production COPY . . EXPOSE 3000 CMD ["node", "/app/bin/www"] 7. Leverage Multi-Stage Builds to Separate Build and Runtime In many Node.js projects, you might need tools like TypeScript or linters during the build phase—but they’re unnecessary in the final production image. That’s where multi-stage builds come in handy. Before: Everything—from installation to build to running—happens in a single image, meaning all build-time tools get carried into production. After: You separate the "build" and "run" stages, keeping only what’s strictly needed at runtime. Result: Smaller, cleaner production imageBuild-time dependencies are excludedFaster and safer deployments Final Optimized Dockerfile # Stage 1 - Builder FROM node:20-alpine AS builder WORKDIR /app RUN apk add --no-cache python3 make g++ COPY package*.json ./ RUN npm install --only=production COPY . . # Stage 2 - Production FROM node:20-alpine WORKDIR /app COPY --from=builder /app/node_modules ./node_modules COPY --from=builder /app ./ EXPOSE 3000 CMD ["node", "/app/bin/www"] Bonus. Don’t Forget .dockerignore Just like .gitignore, the .dockerignore file excludes unnecessary files and folders from the Docker build context (like node_modules, .git, logs, environment files, etc.). Recommended .dockerignore: node_modules .git *.log .env Dockerfile.dev tests/ Why it matters: Faster builds (Docker doesn’t copy irrelevant files)Smaller and cleaner imagesLower risk of leaking sensitive or unnecessary files Results of Optimization 1. Smaller Image Size: The switch to node:20-alpine and removal of unnecessary packages reduced the image size from 1.36GB, down to 862MB. 2. Faster Build Times: Leveraging caching for dependency installation speeds up rebuilds significantly.Build No Cache:Ubuntu (Old Dockerfile): ~126.2sNode 20 Alpine (New Dockerfile): 78.4sRebuild With Cache (After file changes):Ubuntu: 37.1s (Re-run: npm install)Node 20 Alpine: 8.7s (All Cached) 3. Production-Ready Setup: The image now includes only essential build tools and runtime dependencies, making it secure and efficient for production. By following these changes, your Dockerfile is now lighter, faster, and better suited for production environments. Let me know if you’d like further refinements! Conclusion Optimizing your Dockerfile is a crucial step in building smarter, faster, and more efficient containers. By adopting best practices: such as choosing the right base image, simplifying installed packages, leveraging caching, and using production-ready configurations, you can significantly enhance your build process and runtime performance. In this article, we explored how small, deliberate changes—like switching to node:20-alpine, removing unnecessary tools, and refining dependency management—can lead to.

          08/07/2025

          55

          Bao Dang D. Q.

          How-to

          +1

          • Knowledge

          Build Smarter: Best Practices for Creating Optimized Dockerfile

          08/07/2025

          55

          Bao Dang D. Q.

          View Transitions API

          Knowledge

          Software Development

          +0

            How to Create Smooth Navigation Transitions with View Transitions API and React Router?

            Normally, when users move between pages in a web app, they see a white flash or maybe a skeleton loader. That’s okay, but it doesn’t feel smooth. Try View Transitions API! Imagine you have a homepage showing a list of movie cards. When you click one, it takes you to a detail page with a big banner of the same movie. Right now, there’s no animation between these two screens, so the connection between them feels broken. With the View Transitions API, we can make that connection smoother. It creates animations between pages, helping users feel like they’re staying in the same app instead of jumping from one screen to another. Smooth and connected transition using View Transitions API In this blog, you’ll learn how to create these nice transitions using the View Transitions API and React Router v7. Basic Setup The easiest way to use view transitions is by adding the viewTransition prop to your React Router links: import { NavLink } from 'react-router'; <NavLink to='/movies/avengers-age-of-ultron' viewTransition> Avengers: Age of Ultron </NavLink> Only cross-fade animation without element linking It works — but it still feels a bit plain. The whole page fades, but nothing stands out or feels connected. Animating Specific Elements In the previous example, the entire page takes part in the transition. But sometimes, you want just one specific element — like an image — to animate smoothly from one page to another. Let’s say you want the movie image on the homepage to smoothly turn into the banner on the detail page. We can do that by giving both images the same view-transition-name. // app/routes/home.tsx export default function Home() { return ( <NavLink to='/movies/avengers-age-of-ultron' viewTransition> <img className='card-image' src='/assets/avengers-age-of-ultron.webp' alt='Avengers: Age of Ultron' /> <span>Avengers: Age of Ultron</span> </NavLink> ); } // app/routes/movie.tsx export default function Movie() { return ( <img className='movie-image' src='/assets/avengers-age-of-ultron.webp' alt='Avengers: Age of Ultron' /> ); } // app.css ... /* This class assign to the image of the movie card in the home page */ .card-image { view-transition-name: movie-image; } /* This class assign to the image of the movie in the movie details page */ .movie-image { view-transition-name: movie-image; } ... Now, when you click a movie card, the image will smoothly grow into the banner image on the next page. It feels much more connected and polished. Animating a single element with view-transition-name Handling Dynamic Data  This works great for a single element, but what happens if you have a list of items, like multiple movies? If you assign the same view-transition-name to all items, the browser won’t know which one to animate. Each transition name must be unique per element — but hardcoding different class names for every item is not scalable, especially when the data is dynamic. Incorrect setup – Same view-transition-name used for all items in a list. The Solution: Assign view-transition-name during navigation Instead of setting the view-transition-name upfront, a more flexible approach is to add it dynamically when navigation starts — that is, when the user clicks a link. // app/routes/home.tsx export default function Home({ loaderData: movies }: Route.ComponentProps) { return ( <ul> {movies.map((movie) => ( <li key={movie.id}> <NavLink to={`/movies/${movie.id}`} viewTransition> <img className='card-image' src={movie.image} alt={movie.title} /> <span>{movie.title}</span> </NavLink> </li> ))} </ul> ); } // app/routes/movie.tsx export default function Movie({ loaderData: movie }: Route.ComponentProps) { return ( <img className='movie-image' src={movie.image} alt={movie.title} /> ); } // app.css ... /* Assign transition names to elements during navigation */ a.transitioning .card-image { view-transition-name: movie-image; } .movie-image { view-transition-name: movie-image; } ... Final output – Smooth transition with dynamic list items Here’s what happens: When a user clicks a link, React Router adds a transitioning class to it.That class tells the browser which image should animate.On the detail page, the image already has view-transition-name: movie-image, so it matches. This way, you can reuse the same CSS for all items without worrying about assigning unique class names ahead of time. You can explore the full source code below: Live DemoSource on GitHub Browser Support The View Transitions API is still relatively new, and browser support is limited:  Chrome (from version 111)Edge (Chromium-based)Firefox & Safari: Not supported yet (as of May 2025) You should always check for support before using it in production. Conclusion The View Transitions API gives us a powerful tool to deliver smooth, native-feeling page transitions in our web apps. By combining it with React Router, you can: Enable basic transitions with minimal setupAnimate specific elements using view-transition-nameHandle dynamic content gracefully by assigning transition names at runtime Hope this guide helps you create more fluid and polished navigation experiences in your React projects!

            08/07/2025

            60

            Knowledge

            +1

            • Software Development

            How to Create Smooth Navigation Transitions with View Transitions API and React Router?

            08/07/2025

            60

            Customize software background

            Want to customize a software for your business?

            Meet with us! Schedule a meeting with us!