Header image

How to maximize virtual recruitment and training for app development

16/01/2023

296

Virtual work is a concept that has been introduced previously in the professional world, especially in the tech industry. Most companies are embracing remote and hybrid work to expand their employment pool and maximize efficiency and output. This was confirmed in a study by Cielo in 2020 – The Future of Work Survey. The study showed that 64% of recruiters are now more open to virtual work.

The popularity of remote work skyrocketed with the onset of the Covid-19 pandemic that took the world by storm, causing worldwide lockdowns and closure of non-essential businesses. To save their companies, CEOs adopted remote work. Although the pandemic is under control and it’s full steam ahead for all companies, many have retained remote or virtual employment.

However, remote, and physical work require different strategies to maximize their potential. Therefore, relying on the exact procedures for hiring, onboarding, and training workers would be detrimental.

Without face-to-face interaction with your employees, assessing their potential, hard and soft skills, professionalism, and whether they would be a good fit for your organization is challenging. The good news is that there are multiple ways you can replicate the physical experience of interviewing, hiring, onboarding, and training employees without wasting resources and time.

This article will discuss ways to maximize virtual recruitment and training for app development.

1.    Plan virtual recruitment events

Source: Unsplash

Recruitment events are an excellent opportunity to expand the talent pool, boost brand awareness, and establish connections with potential candidates. Job fairs are relatively easy to set up depending on the platform you choose and other third-party software services you include.

Indeed and Brazen are two of the most popular platforms you can use to organize job fairs. You can create an account, sign up, and create your virtual event in minutes. After creating your event, you can link to other apps like Zoom to allow for video conferencing. Although, some apps come with video conferencing tools embedded in them.

A day before the event, you can open the ‘lobby’ and let other interviewers in and prepare for the fair by customizing greetings and questions.

Brazen is a crowd favorite because of its ‘booth’ feature that allows companies to share information about their culture and environment that is readily available to anyone who registers for the fair. This information includes pictures, videos, short text, and links to other relevant pages.

Once applicants register for a fair, a landing page automatically collects their resumes, cover letters, and additional information.

At the end of job fairs, recruiters can take the next steps with candidates who stood out, such as direct messaging, emailing them or forwarding their information to concerned parties for further assessment.

2.    Request video applications

Source: Unsplash

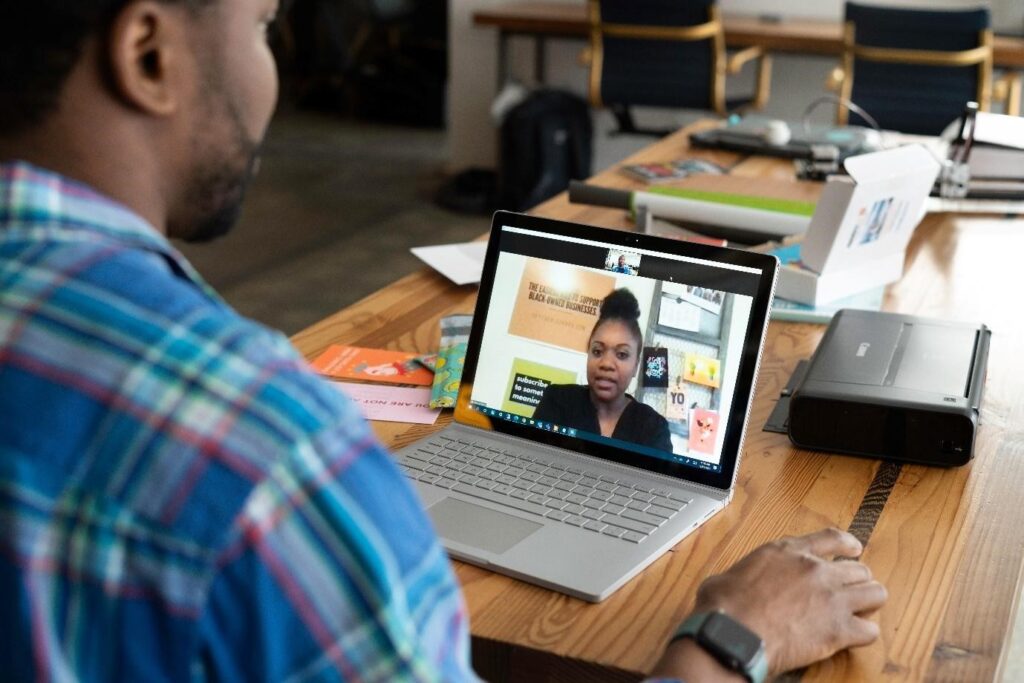
You can opt for video interviews if you want to get a real feel of a face-to-face interview without the awkward silences, tension and wait times. In addition, video interviews are a creative way to get an insight into the behavior of your potential employees.

For video interviews, you can send out questions they can answer in a self-recorded interview that they have to submit before a specific time. For instance, you can ask them to answer hypothetical questions directly related to the role they are applying for, their strengths, weaknesses, experience, qualifications, and achievements they are most proud of.

Video interviews can help you infer whether an applicant is confident, honest, ambitious, and skilled and whether they would fit your company well.

3.    Grow your employer’s brand

Employers want to hire the crème de la crème in each field to build top-notch apps. However, this is easier said than done. If you want to hire the best talent, you have to ensure that they know about your company’s existence. If you are just starting out, this can be pretty challenging, especially when you want to recruit remotely.

One way to fix this is by increasing brand awareness. Developers need to know about your company, and they should want to work with you. You can start by working on your online presence—open social media accounts on all appropriate platforms like LinkedIn, Indeed, Twitter, Facebook, etc. In addition, populate your website with information about your company, such as the culture, vision, mission, portfolio, and events.

Add real pictures of employees at the workplace if you have a physical office, and even create virtual tours so applicants can get a sneak peek into your work environment.

Note: You can outsource your PR work to professionals if you want a highly effective brand presence.

Lastly, monitor reviews about your company on platforms like Glassdoor. You can learn much from an objective perspective on your company.

4.    Make use of ATS

Source: Unsplash

Application tracking software is a lifesaver for HR teams. Screening, interviewing, and hiring candidates can be an overwhelming experience, especially for jobs that can be done remotely, like app development. You will have more than the average number of applications if you open the role to any qualified applicant worldwide.

Application tracking software will help you cut the hiring process by days. ATS takes care of receiving resumes, cover letters, and contact information and storing it. ATS also handles screening candidates and rooting out unqualified candidates to reduce the load recruiters have to deal with personally.

In addition, it lets candidates see their application status and handles the scheduling of interviewers.

5.    Keep lines of communication open at all times

Source: Unsplash

Although virtual hiring may be commonplace for your company, some applicants may be new to the entire process. It can feel like an isolating and scary process because they don’t have candidates the comfort and camaraderie of other candidates, they would have met at the interview venue. To get the most out of your remote hiring and onboarding process, you should ensure that your potential employees are as comfortable as possible.

You can achieve this by keeping lines of communication open and responsive at all times.

Below, I will share a few tips to make the process easier for candidates.

  • Create a comprehensive document that will be shared with all applicants

To avoid confusion and chaos in hiring, you can create a simple document that answers most of the questions candidates may have. For instance, the video interview date, the hiring process, its stages, who will be conducting the interviews, how long the interviews will be, and what sample questions they can expect.

Candidates are always unsure about video interviews because each company conducts their interviews differently. In the PDF, let them know whether it will be a video interview or an audio one. If they must have their video on, state the dress code and whether they should join early and stay in the waiting room.

You can also let them know if they need a pen and notepad ready to take notes. By clearly outlining all this, you are guaranteed confident and prepared candidates.
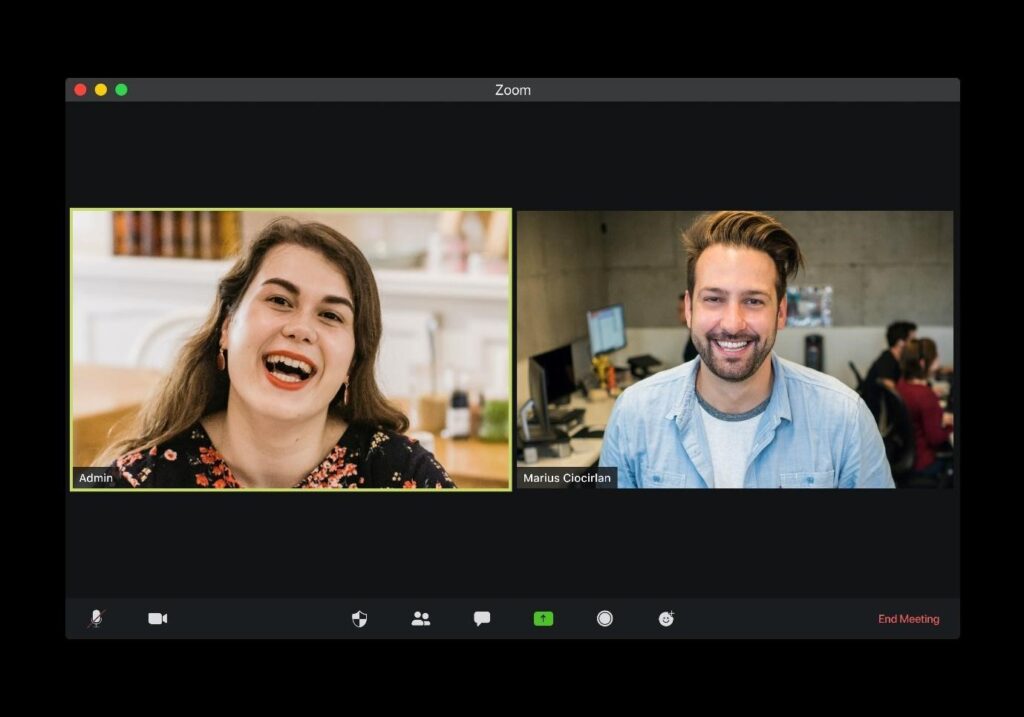
  • Hold AMA sessions

Source: Unsplash

As we mentioned earlier, virtual interviews mean applicants don’t have the luxury of meeting other candidates and sharing extra information about the job or company. To remedy this, you can hold ‘Ask Me Anything’ sessions to let them ask any questions they may have about the organization and role they are applying for.

In addition, you can acquaint them with the hiring process, how long it will take and how they will know if they’ve made it to the next level.

AMA sessions are a great idea because they let candidates get familiar with the company and allow you to feel the candidates out. You will be able to see the candidates who are chatty, confident, enthusiastic, and confident by the frequency with which they ask questions and voice their concerns and issues.

Every employer wants a social candidate who isn’t afraid to stand out. AMA sessions are an opportunity to express that.

Bonus: You can record these sessions and save them for future purposes. Instead of holding them whenever you hire, you can share them with potential employees and save time.

6.    Take shortlisted candidates for a trial run

Source: Unsplash

If you want to be sure of your potential candidate’s hard skills before you commit to a full-time role, you can make the final stage of the interview process a simple paid job that they have to complete in a given amount of time.

Alternatively, it can be a simple live test during their interview to ensure they don’t have outside help. Finally, successful candidates can be hired and offered the role in a formal email.

7.    Send out welcome packages

Source: Unsplash

Who said virtual hiring has to be impersonal and cold? You can take the seriousness out of hiring by sending a surprise welcome SWAG bag to the hired candidate. It can include a brochure, branded products, a company laptop, you name it. If your pockets are deep, you can throw in a fun extra gift like a box of chocolates or a Starbucks gift card.

Wrapping up

If you borrow most of these tips, hiring and training remote workers can be the most seamless and rewarding experience.

Are you developing an app and need a hands-on remote team? Check out SupremeTech. We are an outsourcing IT company focusing on mobile and web apps for English-speaking clients. We build the products using the agile methodology based on the client’s demands and maintain them.

Related Blog

job matching app

HR Tech

Our success stories

+0

    Job matching app: Bridging the Gap Between Job Seekers and Career Consultants

    The job matching app aims to help job seekers find suitable employment opportunities with support from career consultants. What's intriguing is that this platform has expanded from a previous mobile app to create a more comprehensive and versatile platform on computers. As a technical partner, it was an exciting journey for us, SupremeTech! Job Seeker Experience: The Catalyst for the Emergence of the Job Matching App According to MaketSplash, 72% of recruiters struggled to find suitable candidates, while 42% worried about not finding top talent. This highlights the difficulty in sourcing fitting candidates for businesses, necessitating changes for both recruiters and candidates to keep up with trends and "find each other" on their career journeys. A pivotal trend in successful recruitment processes for businesses is candidate experience. This strategy is novel and could become a new approach for years to come. Candidates with positive experiences during the hiring process find it easier to secure a job, and some may even refer others to join the company. A survey by Kelly Services revealed that 95% of candidates impressed by the recruitment process would reapply, and 55% would share their experiences on social media, enhancing the company's reputation. This also contributes to strengthening the relationship between the company and potential candidates. To be at the forefront of recruitment trends and establish a modern hiring environment, this job search app is not merely a tool but a reliable companion in the job search journey. With numerous unique features and conveniences, this app has revolutionized how candidates and career consultants interact and collaborate. Beyond a Simple Recruitment App The job search app is pioneering and unique, marking a breakthrough in the current market. Stemming from a distinctive idea, it swiftly became a platform that fosters unprecedented interaction between candidates and recruitment experts. The app provides a platform for candidates to connect freely with any recruitment expert, offering them diverse access to knowledge and experience. This helps candidates grasp the job market better and provides opportunities to optimize their career paths. It’s a unique connection platform aimed at supporting both candidates and recruitment experts. Designed to ensure the best experience for both parties, this job matching app facilitates seamless information exchange, messaging, and even real-time video calls with recording features. Job seekers and career consultants can video call to discuss and adjust the job seeker's profile to suit modern recruitment requirements. Time Challenge for SupremeTech: Completing the API in 2 Months Faced with this unique endeavor, SupremeTech undertakes a demanding task: The massive creation of APIs for multiple screens within a mere two-month window. Unlike previous clients, this project focuses solely on backend development, postponing front-end work for later. Within this two-month span, SupremeTech team must finalize the API and successfully conduct thorough testing. Tackling this project brings forth its own set of challenges. Complex architectural decisions, meeting time constraints, integrating intricate business logic, ensuring thorough testing, adapting to evolving requirements, and guaranteeing scalability are pivotal.The journey's culmination marks a testament to SupremeTech's dedication and professionalism. As the API nears its completion and testing phase, it stands as a shining example of our commitment to delivering exceptional solutions, even under stringent timelines. How the App Adds Value for Job Seekers Young individuals or recent graduates often need help in their job search process. They struggle to create an appealing resume, possess professional interview skills, and lack connections during their job search. Our clients developed this app to address all these issues. Creating Detailed Profiles  One standout advantage of the app is the ability to create a detailed, unique profile that aligns with recruiters' needs. Each candidate can effortlessly craft a resume that recruiters desire by utilizing available templates. These templates are meticulously researched and encompass the majority of recruiters' requirements. From personal information to accomplishments and work experience, candidates can present a comprehensive picture of themselves, garnering recruiters' attention. Orientation video calls – Effective Communication and Enhanced Profiles The app introduces the opportunity for orientation video calls between candidates and career consultants. This provides a deeper insight into the candidate’s industry and personality. The conversation not only helps candidates understand the job market and trends better but also allows career consultants to offer honest evaluations of strengths and weaknesses. The unique feature of this app is that during the call, consultants can access the job seeker's portfolio and edit it directly. They can simultaneously share their screen, discuss, and update information. (Outside of the call duration, consultants no longer have this access). This means candidates have the chance to present a polished and appealing resume to all recruiters. Connecting with Multiple Career Consultants - Expanding Scope and Opportunities The app offers diversity by enabling connections with various career consultants in different fields. This opens up new opportunities for candidates to explore and learn about multiple career paths. Rather than focusing on a single industry, job seekers can seek in-depth guidance from experts in various domains, aiding them in better understanding multiple career development paths. The job search app truly surpasses limitations, providing flexible space and diverse opportunities for candidates to excel in their quest for their dream job. How Consultants Find Candidates on the App? On this platform, not only does it create opportunities for job seekers, but consultants can also search for candidates and earn additional income. So, how do they search for candidates and operate on the app?  Job seekers select and are matched with a career consultant of their choice. Job seekers will have a video chat with a consultant to discuss the job. Based on the conversation, consultants guide and help candidates create profiles that attract recruiters.Consultants discuss with companies, and companies evaluate candidates based on their portfolios.Companies can send offers to job seekers.If the match is completed, the consultant can earn money Development systems and technologies Below are the resources and technologies we use to develop the services: Details of entrustment: Design, Implementation, TestingPlatform: WebTechnology: GCP, MySQLFramework: PHP Laravel Let SupremeTech Create Your Job Matching App for Your Business SupremeTech brings a wealth of experience in developing advanced applications that cater to the diverse needs of businesses. Drawing from the information you've provided about your objectives and requirements for the app, we are poised to craft a tailored solution that perfectly aligns with your business.

    11/09/2023

    959

    HR Tech

    +1

    • Our success stories

    Job matching app: Bridging the Gap Between Job Seekers and Career Consultants

    11/09/2023

    959

    mass recruitment process

    HR Tech

    +0

      Mass Recruitment in the Digital Age: The Future of Hiring

      Finding enough "good" candidates is always the biggest problem when we talk to organizations of all shapes and sizes. When businesses must fill a large number of openings quickly, the issue becomes more challenging. For recruiting teams, who struggle to handle the mass recruitment, this is a major headache. The solution to problems will be supportive technology software and applications, which will simplify the hiring process for both the company and the candidates. What is Mass Recruitment? Mass recruitment refers to the process of hiring a significant number of individuals within a particular time frame. This approach is often utilized when a company is rapidly growing or requires many new employees simultaneously, such as when opening a new branch or during peak periods in service industries. In contrast to low-volume hiring, the mass recruitment procedure necessitates more preparation work and takes longer to choose candidates. Because of this, focusing more on hiring speed, automation, and efficiency is necessary for mass hiring, especially when it comes to getting rid of manual processes that become unworkable at scale. Why Should You Make Use of Mass Recruitment? Although it is uncommon to come across many businesses using this method of hiring employees, it is the most effective choice when it comes to incorporating the right candidates for brief periods of time. Those advantages mentioned below will prove that assertion. Speed and Efficiency Let's say you are the head of recruitment, and one day, your boss announces that a new branch will open early in the following year. It's exciting news that shows how well-run and quickly expanding the company is. However, you are aware that the new branch will need to hire hundreds of new employees quickly, and your boss will not tolerate any compromise on the quality of the candidates. Then the most effective solution that can meet the criteria of time and quality is definitely mass hiring. This is the proper hiring procedure that aids in selecting the best candidates. However, these steps can be streamlined with the help of recruitment automation, which is crucial when hiring large numbers of candidates. Recruitment automation uses digital technologies to speed up the hiring process by automating various tasks and workflows, increasing productivity, and assisting recruiters in saving time, money, and resources while improving the overall quality of candidates. Access to a Wider Pool of Candidates Reaching a large number of candidates is not too difficult due to the popularity of social networking sites and recruitment websites. According to Jobvite, while the average job posting attracts less than 50 candidates, high-volume hiring draws in more than 250 candidates. Mass hiring entails luring a sizable pool of applicants whose resumes are all logged by the company. Every time a new position becomes available, the recruiting team cannot simply search for new applicants. Past candidates' profiles contain useful information that recruiters should also consider. The larger candidate pool gives recruiters more opportunities to gather pertinent information, enhancing the effectiveness of your hiring decisions. Cost-Effectiveness The Economist estimates that businesses worldwide have spent more than $400 billion on human resources services. A Glassdoor study found that the average cost of hiring an employee is about $4,000. However, organizations have been able to cut costs significantly through Mass Recruitment. This hiring method significantly decreases recruiting costs because less wasteful advertising, administrative, and employee costs are incurred. How to Best Optimize Your Mass Recruitment Strategy? Mass hiring can achieve rapid employee growth, but there are certain risks involved, most notably negative candidate experiences. However, with careful planning, these problems can be avoided. Define Your Criteria If you first define the objectives of your organization, you can save a lot of time during the hiring process. Explain to the hiring team the qualities you're looking for in candidates, such as skills, work experience, background education, or even personality and attitude. You can also create a screening template that specifies the inquiries you'll make and the kinds of responses you want from applicants. As with any hiring process, each position must have a detailed job description. If you are recruiting multiple people for the same job, this process becomes much easier. With the final description, you are ready to provide potential candidates with a clear picture of the job. Develop a Strong Employer Brand A strong employer brand will attract more applicants for open positions, better-qualified candidates, and lower turnover. From a survey by CR Magazine and Cielo Talent, 69% of workers said they would not choose a company with a poor reputation, even if it is the only offer they get. Businesses must work on their employer brand to demonstrate that they deserve to be chosen as an employer to attract qualified candidates, especially for Mass hiring, where more than just job postings are required. Keep the Candidate’s Experience in Mind Mass hiring increases your hiring process's positive and negative aspects because many candidates will likely contact your business quickly. From the first contact to when you make the job offer, you can still give each candidate a personalized experience even though you need to hire many candidates quickly. It's a candidate-driven market because there is a global talent shortage. Companies that do not care about the candidate's experience will struggle in the current labor market. At every stage of the hiring process, candidates should be updated on the status of their applications and the next steps and given plenty of guidance and support to help improve their chances of success. For this reason, you should try to automate communication with candidates whenever you can. Use Technology to Streamline the Process Automation Technology is the key to any successful mass hiring. Miahire can be an excellent option if you're looking for an automation solution to improve workflow and reduce the need for manual or repetitive tasks. Miahire is a video interviewing solution that enables you to screen candidates more quickly and efficiently by digitizing the process of large-scale recruitment. Manage and set up the interview: Miahire makes it simple to list questions, create an automatic interview schedule, and easily adjust the format and allotment of time for each candidate to respond to questions.Evaluate candidates: Using evaluation forms already created for each job position, recruiters can quickly and fairly assess candidates by comparing positive responses. In particular, video interviews allow you to review candidates whenever you like and consider as many as you like before making a choice.Miahire is available on many different platforms: From web browsers to mobile applications, candidates can attend the interview on-demand at any time and from any location. There won't be any more back-and-forth phone calls to set up an interview time that works for everyone, which improves their onboarding experience. With all these highlights, Miahire can help you halve the time required to review applications and conduct interviews without compromising the qualities of hires. Conclusion Although mass hiring is difficult, it doesn't have to be chaotic. Using a well-thought-out strategy and AI-based technology and tools, recruiters can confidently carry it out without skipping anything crucial. Discover Miahire, the best mass recruitment solution from SupremeTech - an outsource app development team, to hire excellent talent on a larger scale more quickly. References Dixon, A. (2024) 4 innovative strategies for high volume hiring, ideal. Available at: https://ideal.com/high-volume-hiring/ (Accessed: 15 October 2024). Jackson, M. (no date) Mass hiring made easy: Best practices and proven strategies, SwagDrop. Available at: https://swagdrop.com/mass-hiring/ (Accessed: 15 October 2024). Team, G. (no date) How to calculate cost-per-hire (CPH), Glassdoor. Available at: https://www.glassdoor.com/blog/calculate-cost-per-hire/ (Accessed: 15 October 2024).

      08/04/2023

      1.03k

      HR Tech

      +0

        Mass Recruitment in the Digital Age: The Future of Hiring

        08/04/2023

        1.03k

        Knowledge

        +0

          Best Practices for Building Reliable AWS Lambda Functions

          Welcome back to the "Mastering AWS Lambda with Bao" series! The previous episode explored how AWS Lambda connects to the world through AWS Lambda triggers and events. Using S3 and DynamoDB Streams triggers, we demonstrated how Lambda automates workflows by processing events from multiple sources. This example provided a foundation for understanding Lambda’s event-driven architecture. However, building reliable Lambda functions requires more than understanding how triggers work. To create AWS lambda functions that can handle real-world production workloads, you need to focus on optimizing performance, implementing robust error handling, and enforcing strong security practices. These steps optimize your Lambda functions to be scalable, efficient, and secure. In this episode, SupremeTech will explore the best practices for building reliable AWS Lambda functions, covering two essential areas: Optimizing Performance: Reducing latency, managing resources, and improving runtime efficiency.Error Handling and Logging: Capturing meaningful errors, logging effectively with CloudWatch, and setting up retries. Adopting these best practices, you’ll be well-equipped to optimize Lambda functions that thrive in production environments. Let’s dive in! Optimizing Performance Optimize the Lambda function's performance to run efficiently with minimal latency and cost. Let's focus first on Cold Starts, a critical area of concern for most developers. Understanding Cold Starts What Are Cold Starts? A Cold Start occurs when AWS Lambda initializes a new execution environment to handle an incoming request. This happens under the following circumstances: When the Lambda function is invoked for the first time.After a period of inactivity (execution environments are garbage collected after a few minutes of no activity – meaning it will be shut down automatically).When scaling up to handle additional concurrent requests. Cold starts introduce latency because AWS needs to set up a new execution environment from scratch. Steps Involved in a Cold Start: Resource Allocation:AWS provisions a secure and isolated container for the Lambda function.Resources like memory and CPU are allocated based on the function's configuration.Execution Environment Initialization:AWS sets up the sandbox environment, including:The /tmp directory is for temporary storage.Networking configurations, such as Elastic Network Interfaces (ENI), for VPC-based Lambdas.Runtime Initialization:The specified runtime (e.g., Node.js, Python, Java) is initialized.For Node.js, this involves loading the JavaScript engine (V8) and runtime APIs.Dependency Initialization:AWS loads the deployment package (your Lambda code and dependencies).Any initialization code in your function (e.g., database connections, library imports) is executed.Handler Invocation:Once the environment is fully set up, AWS invokes your Lambda function's handler with the input event. Cold Start Latency Cold start latency varies depending on the runtime, deployment package size, and whether the function runs inside a VPC: Node.js and Python: ~200ms–500ms for non-VPC functions.Java or .NET: ~500ms–2s due to heavier runtime initialization.VPC-Based Functions: Add ~500ms–1s due to ENI initialization. Warm Starts In contrast to cold starts, Warm Starts reuse an already-initialized execution environment. AWS keeps environments "warm" for a short time after a function is invoked, allowing subsequent requests to bypass initialization steps. Key Differences: Cold Start: New container setup → High latency.Warm Start: Reused container → Minimal latency (~<100ms). Reducing Cold Starts Cold starts can significantly impact the performance of latency-sensitive applications. Below are some actionable strategies to reduce cold starts, each with good and bad practice examples for clarity. 1. Use Smaller Deployment Packages to optimize lambda function Good Practice: Minimize the size of your deployment package by including only the required dependencies and removing unnecessary files.Use bundlers like Webpack, ESBuild, or Parcel to optimize your package size.Example: const DynamoDB = require('aws-sdk/clients/dynamodb'); // Only loads DynamoDB, not the entire SDK Bad Practice: Bundling the entire AWS SDK or other large libraries without considering modular imports.Example: const AWS = require('aws-sdk'); // Loads the entire SDK, increasing package size Why It Matters: Smaller deployment packages load faster during the initialization phase, reducing cold start latency. 2. Move Heavy Initialization Outside the Handler Good Practice: Place resource-heavy operations, such as database or SDK client initialization, outside the handler function so they are executed only once per container lifecycle – a cold start.Example: const DynamoDB = new AWS.DynamoDB.DocumentClient(); exports.handler = async (event) => {     const data = await DynamoDB.get({ Key: { id: '123' } }).promise();     return data; }; Bad Practice: Reinitializing resources inside the handler for every invocation.Example: exports.handler = async (event) => {     const DynamoDB = new AWS.DynamoDB.DocumentClient(); // Initialized on every call     const data = await DynamoDB.get({ Key: { id: '123' } }).promise();     return data; }; Why It Matters: Reinitializing resources for every invocation increases latency and consumes unnecessary computing power. 3. Enable Provisioned Concurrency1 Good Practice: Use Provisioned Concurrency to pre-initialize a set number of environments, ensuring they are always ready to handle requests.Example:AWS CLI: aws lambda put-provisioned-concurrency-config \ --function-name myFunction \ --provisioned-concurrent-executions 5 AWS Management Console: Why It Matters: Provisioned concurrency ensures a constant pool of pre-initialized environments, eliminating cold starts entirely for latency-sensitive applications. 4. Reduce Dependencies to optimize the lambda function Good Practice: Evaluate your libraries and replace heavy frameworks with lightweight alternatives or native APIs.Example: console.log(new Date().toISOString()); // Native JavaScript API Bad Practice: Using heavy libraries for simple tasks without considering alternatives.Example: const moment = require('moment'); console.log(moment().format()); Why It Matters: Large dependencies increase the deployment package size, leading to slower initialization during cold starts. 5. Avoid Unnecessary VPC Configurations Good Practice: Place Lambda functions outside a VPC unless necessary. If a VPC is required (e.g., to access private resources like RDS), optimize networking using VPC endpoints.Example:Use DynamoDB and S3 directly without placing the Lambda inside a VPC. Bad Practice: Deploying Lambda functions inside a VPC unnecessarily, such as accessing services like DynamoDB or S3, which do not require VPC access.Why It’s Bad: Placing Lambda in a VPC introduces additional latency due to ENI setup during cold starts. Why It Matters: Functions outside a VPC initialize faster because they skip ENI setup. 6. Choose Lightweight Runtimes to optimize lambda function Good Practice: Use lightweight runtimes like Node.js or Python for faster initialization than heavier runtimes like Java or .NET.Why It’s Good: Lightweight runtimes require fewer initialization resources, leading to lower cold start latency. Why It Matters: Heavier runtimes have higher cold start latency due to the complexity of their initialization process. Summary of Best Practices for Cold Starts AspectGood PracticeBad PracticeDeployment PackageUse small packages with only the required dependencies.Bundle unused libraries, increasing the package size.InitializationPerform heavy initialization (e.g., database connections) outside the handler.Initialize resources inside the handler for every request.Provisioned ConcurrencyEnable provisioned concurrency for latency-sensitive applications.Ignore provisioned concurrency for high-traffic functions.DependenciesUse lightweight libraries or native APIs for simple tasks.Use heavy libraries like moment.js without evaluating lightweight alternatives.VPC ConfigurationAvoid unnecessary VPC configurations; use VPC endpoints when required.Place all Lambda functions inside a VPC, even when accessing public AWS services.Runtime SelectionChoose lightweight runtimes like Node.js or Python for faster initialization.Use heavy runtimes like Java or .NET for simple, lightweight workloads. Error Handling and Logging Error handling and logging are critical for optimizing your Lambda functions are reliable and easy to debug. Effective error handling prevents cascading failures in your architecture, while good logging practices help you monitor and troubleshoot issues efficiently. Structured Error Responses Errors in Lambda functions can occur due to various reasons: invalid input, AWS service failures, or unhandled exceptions in the code. Properly structured error handling ensures that these issues are captured, logged, and surfaced effectively to users or downstream services. 1. Define Consistent Error Structures Good Practice: Use a standard error format so all errors are predictable and machine-readable.Example: {   "errorType": "ValidationError",   "message": "Invalid input: 'email' is missing",   "requestId": "12345-abcd" } Bad Practice: Avoid returning vague or unstructured errors that make debugging difficult. { "message": "Something went wrong", "error": true } Why It Matters: Structured errors make debugging easier by providing consistent, machine-readable information. They also improve communication with clients or downstream systems by conveying what went wrong and how it should be handled. 2. Use Custom Error Classes Good Practice: In Node.js, define custom error classes for clarity: class ValidationError extends Error {   constructor(message) {     super(message);     this.name = "ValidationError";     this.statusCode = 400; // Custom property   } } // Throwing a custom error if (!event.body.email) {   throw new ValidationError("Invalid input: 'email' is missing"); } Bad Practice: Use generic errors for everything, making identifying or categorizing issues hard.Example: throw new Error("Error occurred"); Why It Matters: Custom error classes make error handling more precise and help segregate application errors (e.g., validation issues) from system errors (e.g., database failures). 3. Include Contextual Information in Logs Good Practice: Add relevant information like requestId, timestamp, and input data (excluding sensitive information) when logging errors.Example: console.error({     errorType: "ValidationError",     message: "The 'email' field is missing.",     requestId: context.awsRequestId,     input: event.body,     timestamp: new Date().toISOString(), }); Bad Practice: Log errors without any context, making debugging difficult.Example: console.error("Error occurred"); Why It Matters: Contextual information in logs makes it easier to identify what triggered the error and where it happened, improving the debugging experience. Retry Logic Across AWS SDK and Other Services Retrying failed operations is critical when interacting with external services, as temporary failures (e.g., throttling, timeouts, or transient network issues) can disrupt workflows. Whether you’re using AWS SDK, third-party APIs, or internal services, applying retry logic effectively can ensure system reliability while avoiding unnecessary overhead. 1. Use Exponential Backoff and Jitter Good Practice: Apply exponential backoff with jitter to stagger retry attempts. This avoids overwhelming the target service, especially under high load or rate-limiting scenarios.Example (General Implementation): async function retryWithBackoff(fn, retries = 3, delay = 100) {     for (let attempt = 1; attempt <= retries; attempt++) {         try {             return await fn();         } catch (error) {             if (attempt === retries) throw error; // Rethrow after final attempt             const backoff = delay * 2 ** (attempt - 1) + Math.random() * delay; // Add jitter             console.log(`Retrying in ${backoff.toFixed()}ms...`);             await new Promise((res) => setTimeout(res, backoff));         }     } } // Usage Example const result = await retryWithBackoff(() => callThirdPartyAPI()); Bad Practice: Retrying without delays or jitter can lead to cascading failures and amplify the problem. for (let i = 0; i < retries; i++) {     try {         return await callThirdPartyAPI();     } catch (error) {         console.log("Retrying immediately...");     } } Why It Matters: Exponential backoff reduces pressure on the failing service, while jitter randomizes retry times, preventing synchronized retry storms from multiple clients. 2. Leverage Built-In Retry Mechanisms Good Practice: Use the built-in retry logic of libraries, SDKs, or APIs whenever available. These are typically optimized for the specific service.Example (AWS SDK): const DynamoDB = new AWS.DynamoDB.DocumentClient({     maxRetries: 3, // Number of retries     retryDelayOptions: { base: 200 }, // Base delay in ms }); Example (Axios for Third-Party APIs):Use libraries like axios-retry to integrate retry logic for HTTP requests. const axios = require('axios'); const axiosRetry = require('axios-retry'); axiosRetry(axios, {     retries: 3, // Retry 3 times     retryDelay: (retryCount) => retryCount * 200, // Exponential backoff     retryCondition: (error) => error.response.status >= 500, // Retry only for server errors }); const response = await axios.get("https://example.com/api"); Bad Practice: Writing your own retry logic unnecessarily when built-in mechanisms exist, risking suboptimal implementation. Why It Matters: Built-in retry mechanisms are often optimized for the specific service or library, reducing the likelihood of bugs and configuration errors. 3. Configure Service-Specific Retry Limits Good Practice: Set retry limits based on the service's characteristics and criticality.Example (AWS S3 Upload): const s3 = new AWS.S3({ maxRetries: 5, // Allow more retries for critical operations retryDelayOptions: { base: 300 }, // Slightly longer base delay }); Example (Database Queries): async function queryDatabaseWithRetry(queryFn) {     await retryWithBackoff(queryFn, 5, 100); // Retry with custom backoff logic } Bad Practice: Allowing unlimited retries can cause resource exhaustion and increase costs. while (true) {     try {         return await callService();     } catch (error) {         console.log("Retrying...");     } } Why It Matters: Excessive retries can lead to runaway costs or cascading failures across the system. Always define a sensible retry limit. 4. Handle Transient vs. Persistent Failures Good Practice: Retry only transient failures (e.g., timeouts, throttling, 5xx errors) and handle persistent failures (e.g., invalid input, 4xx errors) immediately.Example: const isTransientError = (error) =>     error.code === "ThrottlingException" || error.code === "TimeoutError"; async function callServiceWithRetry() {     await retryWithBackoff(() => {         if (!isTransientError(error)) throw error; // Do not retry persistent errors         return callService();     }); } Bad Practice: Retrying all errors indiscriminately, including persistent failures like ValidationException or 404 Not Found. Why It Matters: Persistent failures are unlikely to succeed with retries and can waste resources unnecessarily. 5. Log Retry Attempts Good Practice: Log each retry attempt with relevant context, such as the retry count and delay. async function retryWithBackoff(fn, retries = 3, delay = 100) {     for (let attempt = 1; attempt <= retries; attempt++) {         try {             return await fn();         } catch (error) {             if (attempt === retries) throw error;             console.log(`Attempt ${attempt} failed. Retrying in ${delay}ms...`);             await new Promise((res) => setTimeout(res, delay));         }     } } Bad Practice: Failing to log retries makes debugging or understanding the retry behavior difficult. Why It Matters: Logs provide valuable insights into system behavior and help diagnose retry-related issues. Summary of Best Practices for Retry logic AspectGood PracticeBad PracticeRetry LogicUse exponential backoff with jitter to stagger retries.Retry immediately without delays, causing retry storms.Built-In MechanismsLeverage AWS SDK retry options or third-party libraries like axios-retry.Write custom retry logic unnecessarily when optimized built-in solutions are available.Retry LimitsDefine a sensible retry limit (e.g., 3–5 retries).Allow unlimited retries, risking resource exhaustion or runaway costs.Transient vs PersistentRetry only transient errors (e.g., timeouts, throttling) and fail fast for persistent errors.Retry all errors indiscriminately, including persistent failures like validation or 404 errors.LoggingLog retry attempts with context (e.g., attempt number, delay,  error) to aid debugging.Fail to log retries, making it hard to trace retry behavior or diagnose problems. Logging Best Practices Logs are essential for debugging and monitoring Lambda functions. However, unstructured or excessive logging can make it harder to find helpful information. 1. Mask or Exclude Sensitive Data Good Practice: Avoid logging sensitive information like:User credentialsAPI keys, tokens, or secretsPersonally Identifiable Information (PII)Use tools like AWS Secrets Manager for sensitive data management.Example: Mask sensitive fields before logging: const sanitizedInput = {     ...event,     password: "***", }; console.log(JSON.stringify({     level: "info",     message: "User login attempt logged.",     input: sanitizedInput, })); Bad Practice: Logging sensitive data directly can cause security breaches or compliance violations (e.g., GDPR, HIPAA).Example: console.log(`User logged in with password: ${event.password}`); Why It Matters: Logging sensitive data can expose systems to attackers, breach compliance rules, and compromise user trust. 2.  Set Log Retention Policies Good Practice: Set a retention policy for CloudWatch log groups to prevent excessive log storage costs.AWS allows you to configure retention settings (e.g., 7, 14, or 30 days). Bad Practice: Using the default “Never Expire” retention policy unnecessarily stores logs indefinitely. Why It Matters: Unmanaged logs increase costs and make it harder to find relevant data. Retaining logs only as long as needed reduces costs and keeps logs manageable. 3. Avoid Excessive Logging Good Practice: Log only what is necessary to monitor, troubleshoot, and analyze system behavior.Use info, debug, and error levels to prioritize logs appropriately. console.info("Function started processing..."); console.error("Failed to fetch data from DynamoDB: ", error.message); Bad Practice: Logging every detail (e.g., input payloads, execution steps) unnecessarily increases log volume.Example: console.log(`Received event: ${JSON.stringify(event)}`); // Avoid logging full payloads unnecessarily Why It Matters: Excessive logging clutters log storage, increases costs, and makes it harder to isolate relevant logs. 4. Use Log Levels (Info, Debug, Error) Good Practice: Use different log levels to differentiate between critical and non-critical information.info: For general execution logs (e.g., function start, successful completion).debug: For detailed logs during development or troubleshooting.error: For failure scenarios requiring immediate attention. Bad Practice: Using a single log level (e.g., console.log() everywhere) without prioritization. Why It Matters: Log levels make it easier to filter logs based on severity and focus on critical issues in production. Conclusion In this episode of "Mastering AWS Lambda with Bao", we explored critical best practices for building reliable AWS Lambda functions, focusing on optimizing performance, error handling, and logging. Optimizing Performance: By reducing cold starts, using smaller deployment packages, lightweight runtimes, and optimizing VPC configurations, you can significantly lower latency and optimize Lambda functions. Strategies like moving initialization outside the handler and leveraging Provisioned Concurrency ensure smoother execution for latency-sensitive applications.Error Handling: Implementing structured error responses and custom error classes makes troubleshooting easier and helps differentiate between transient and persistent issues. Handling errors consistently improves system resilience.Retry Logic: Applying exponential backoff with jitter, using built-in retry mechanisms, and setting sensible retry limits optimizes that Lambda functions gracefully handle failures without overwhelming dependent services.Logging: Effective logging with structured formats, contextual information, log levels, and appropriate retention policies enables better visibility, debugging, and cost control. Avoiding sensitive data in logs ensures security and compliance. Following these best practices, you can optimize lambda function performance, reduce operational costs, and build scalable, reliable, and secure serverless applications with AWS Lambda. In the next episode, we’ll dive deeper into "Handling Failures with Dead Letter Queues (DLQs)", exploring how DLQs act as a safety net for capturing failed events and ensuring no data loss occurs in your workflows. Stay tuned! Note: 1. Provisioned Concurrency is not a universal solution. While it eliminates cold starts, it also incurs additional costs since pre-initialized environments are billed regardless of usage. When to Use:Latency-sensitive workloads like APIs or real-time applications where even a slight delay is unacceptable.When Not to Use:Functions with unpredictable or low invocation rates (e.g., batch jobs, infrequent triggers). For such scenarios, on-demand concurrency may be more cost-effective.

          13/01/2025

          31

          Bao Dang D. Q.

          Knowledge

          +0

            Best Practices for Building Reliable AWS Lambda Functions

            13/01/2025

            31

            Bao Dang D. Q.

            Knowledge

            +0

              Triggers and Events: How AWS Lambda Connects with the World

              Welcome back to the “Mastering AWS Lambda with Bao” series! In the previous episode, SupremeTech explored how to create an AWS Lambda function triggered by AWS EventBridge to fetch data from DynamoDB, process it, and send it to an SQS queue. That example gave you the foundational skills for building serverless workflows with Lambda. In this episode, we’ll dive deeper into AWS lambda triggers and events, the backbone of AWS Lambda’s event-driven architecture. Triggers enable Lambda to respond to specific actions or events from various AWS services, allowing you to build fully automated, scalable workflows. This episode will help you: Understand how triggers and events work.Explore a comprehensive list of popular AWS Lambda triggers.Implement a two-trigger example to see Lambda in action Our example is simplified for learning purposes and not optimized for production. Let’s get started! Prerequisites Before we begin, ensure you have the following prerequisites in place: AWS Account: Ensure you have access to create and manage AWS resources.Basic Knowledge of Node.js: Familiarity with JavaScript and Node.js will help you understand the Lambda function code. Once you have these prerequisites ready, proceed with the workflow setup. Understanding AWS Lambda Triggers and Events What are the Triggers in AWS Lambda? AWS lambda triggers are configurations that enable the Lambda function to execute in response to specific events. These events are generated by AWS services (e.g., S3, DynamoDB, API Gateway, etc) or external applications integrated through services like Amazon EventBridge. For example: Uploading a file to an S3 bucket can trigger a Lambda function to process the file.Changes in a DynamoDB table can trigger Lambda to perform additional computations or send notifications. How do Events work in AWS Lambda? When a trigger is activated, it generates an event–a structured JSON document containing details about what occurred Lambda receives this event as input to execute its function. Example event from an S3 trigger: { "Records": [ { "eventSource": "aws:s3", "eventName": "ObjectCreated:Put", "s3": { "bucket": { "name": "demo-upload-bucket" }, "object": { "key": "example-file.txt" } } } ] } Popular Triggers in AWS Lambda Here’s a list of some of the most commonly used triggers: Amazon S3:Use case: Process file uploads.Example: Resize images, extract metadata, or move files between buckets.Amazon DynamoDB Streams:Use case: React to data changes in a DynamoDB table.Example: Propagate updates or analyze new entries.Amazon API Gateway:Use case: Build REST or WebSocket APIs.Example: Process user input or return dynamic data.Amazon EventBridge:Use case: React to application or AWS service events.Example: Trigger Lambda for scheduled jobs or custom events. Amazon SQS:Use case: Process messages asynchronously.Example: Decouple microservices with a message queue.Amazon Kinesis:Use case: Process real-time streaming data.Example: Analyze logs or clickstream data.AWS IoT Core:Use case: Process messages from IoT devices.Example: Analyze sensor readings or control devices. By leveraging triggers and events, AWS Lambda enables you to automate complex workflows seamlessly. Setting Up IAM Roles (Optional) Before setting up Lambda triggers, we need to configure an IAM role with the necessary permissions. Step 1: Create an IAM Role Go to the IAM Console and click Create role.Select AWS Service → Lambda and click Next.Attach the following managed policies: AmazonS3ReadOnlyAccess: For reading files from S3.AmazonDynamoDBFullAccess: For writing metadata to DynamoDB and accessing DynamoDB Streams.AmazonSNSFullAccess: For publishing notifications to SNS.CloudWatchLogsFullAccess: For logging Lambda function activity.Click Next and enter a name (e.g., LambdaTriggerRole).Click Create role. Setting Up the Workflow For this episode, we’ll create a simplified two-trigger workflow: S3 Trigger: Processes uploaded files and stores metadata in DynamoDB.DynamoDB Streams Triggers: Sends a notification via SNS when new metadata is added. Step 1: Create an S3 Bucket Open the S3 Console in AWS.Click Create bucket and configure:Bucket name: Enter a unique name (e.g., upload-csv-lambda-st)Region: Choose your preferred region. (I will go with ap-southeast-1)Click Create bucket. Step 2: Create a DynamoDB Table Navigate to the DynamoDB Console.Click Create table and configure:Table name: DemoFileMetadata.Partition key: FileName (String).Sort key: UploadTimestamp (String). Click Create table.Enable DynamoDB Streams with the option New and old images. Step 3: Create an SNS Topic Navigate to the SNS Console.Click Create topic and configure: Topic type: Standard.Name: DemoFileProcessingNotifications. Click Create topic. Create a subscription. Confirm (in my case will be sent to my email). Step 4: Create a Lambda Function Navigate to the Lambda Console and click Create function.Choose Author from scratch and configure:Function name: DemoFileProcessing.Runtime: Select Node.js 20.x (Or your preferred version).Execution role: Select the LambdaTriggerRole you created earlier. Click Create function. Step 5: Configure Triggers Add S3 Trigger:Scroll to the Function overview section and click Add trigger. Select S3 and configure:Bucket: Select upload-csv-lambda-st.Event type: Choose All object create events.Suffix: Specify .csv to limit the trigger to CSV files. Click Add. Add DynamoDB Streams Trigger:Scroll to the Function overview section and click Add trigger. Select DynamoDB and configure:Table: Select DemoFileMetadata. Click Add. Writing the Lambda Function Below is the detailed breakdown of the Node.js Lambda function that handles events from S3 and DynamoDB Streams triggers (Source code). const AWS = require("aws-sdk"); const S3 = new AWS.S3(); const DynamoDB = new AWS.DynamoDB.DocumentClient(); const SNS = new AWS.SNS(); const SNS_TOPIC_ARN = "arn:aws:sns:region:account-id:DemoFileProcessingNotifications"; exports.handler = async (event) => { console.log("Event Received:", JSON.stringify(event, null, 2)); try { if (event.Records[0].eventSource === "aws:s3") { // Process S3 Trigger for (const record of event.Records) { const bucketName = record.s3.bucket.name; const objectKey = decodeURIComponent(record.s3.object.key.replace(/\+/g, " ")); console.log(`File uploaded: ${bucketName}/${objectKey}`); // Save metadata to DynamoDB const timestamp = new Date().toISOString(); await DynamoDB.put({ TableName: "DemoFileMetadata", Item: { FileName: objectKey, UploadTimestamp: timestamp, Status: "Processed", }, }).promise(); console.log(`Metadata saved for file: ${objectKey}`); } } else if (event.Records[0].eventSource === "aws:dynamodb") { // Process DynamoDB Streams Trigger for (const record of event.Records) { if (record.eventName === "INSERT") { const newItem = record.dynamodb.NewImage; // Construct notification message const message = `File ${newItem.FileName.S} uploaded at ${newItem.UploadTimestamp.S} has been processed.`; console.log("Sending notification:", message); // Send notification via SNS await SNS.publish({ TopicArn: SNS_TOPIC_ARN, Message: message, }).promise(); console.log("Notification sent successfully."); } } } return { statusCode: 200, body: "Event processed successfully!", }; } catch (error) { console.error("Error processing event:", error); throw error; } }; Detailed Explanation Importing Required AWS SDK Modules const AWS = require("aws-sdk"); const S3 = new AWS.S3(); const DynamoDB = new AWS.DynamoDB.DocumentClient(); const SNS = new AWS.SNS(); AWS SDK: Provides tools to interact with AWS services.S3 Module: Used to interact with the S3 bucket and retrieve file details.DynamoDB Module: Used to store metadata in the DynamoDB table.SNS Module: Used to publish messages to the SNS topic. Defining the SNS Topic ARN const SNS_TOPIC_ARN = "arn:aws:sns:region:account-id:DemoFileProcessingNotifications"; This is the ARN of the SNS topic where notification will be sent. Replace it with the ARN of your actual topic. Handling the Lambda Event exports.handler = async (event) => { console.log("Event Received:", JSON.stringify(event, null, 2)); The event parameter contains information about the trigger that activated the Lambda function.The event can be from S3 or DynamoDB Streams.The event is logged for debugging purposes. Processing the S3 Trigger if (event.Records[0].eventSource === "aws:s3") { for (const record of event.Records) { const bucketName = record.s3.bucket.name; const objectKey = decodeURIComponent(record.s3.object.key.replace(/\+/g, " ")); console.log(`File uploaded: ${bucketName}/${objectKey}`); Condition: Checks if the event source is S3.Loop: Iterates over all records in the S3 event.Bucket Name and Object Key: Extracts the bucket name and object key from the event.decodeURIComponent() is used to handle special characters in the object key. Saving Metadata to DynamoDB const timestamp = new Date().toISOString(); await DynamoDB.put({ TableName: "DemoFileMetadata", Item: { FileName: objectKey, UploadTimestamp: timestamp, Status: "Processed", }, }).promise(); console.log(`Metadata saved for file: ${objectKey}`); Timestamp: Captures the current time as the upload timestamp.DynamoDB Put Operation:Writes the file metadata to the DemoFileMetadata table.Includes the FileName, UploadTimestamp, and Status.Promise: The put method returns a promise, which is awaited to ensure the operation is completed. Processing the DynamoDB Streams Trigger } else if (event.Records[0].eventSource === "aws:dynamodb") { for (const record of event.Records) { if (record.eventName === "INSERT") { const newItem = record.dynamodb.NewImage; Condition: Checks if the event source is DynamoDB Streams.Loop: Iterates over all records in the DynamoDB Streams event.INSERT Event: Filters only for INSERT operations in the DynamoDB table. Constructing and Sending the SNS Notification const message = `File ${newItem.FileName.S} uploaded at ${newItem.UploadTimestamp.S} has been processed.`; console.log("Sending notification:", message); await SNS.publish({ TopicArn: SNS_TOPIC_ARN, Message: message, }).promise(); console.log("Notification sent successfully."); Constructing the Message:Uses the file name and upload timestamp from the DynamoDB Streams event.SNS Publish Operation:Send the constructed message to the SNS topic.Promise: The publish method returns a promise, which is awaited. to ensure the message is sent. Error Handling } catch (error) { console.error("Error processing event:", error); throw error; } Any errors during event processing are caught and logged.The error is re-thrown to ensure it’s recorded in CloudWatch Logs. Lambda Function Response return {     statusCode: 200,     body: "Event processed successfully!", }; After processing all events, the function returns a successful response. Test The Lambda Function Upload the code into AWS Lambda. Navigate to the S3 Console and choose the bucket you linked to the Lambda Function. Upload a random.csv file to the bucket. Check the result:DynamoDB Table Entry SNS Notifications CloudWatch Logs So, we successfully created a Lambda function that triggered based on 2 triggers. It's pretty simple. Just remember to delete any services after use to avoid incurring unnecessary costs! Conclusion In this episode, we explored AWS Lambda's foundational concepts of triggers and events. Triggers allow Lambda functions to respond to specific actions or events, such as file uploads to S3 or changes in a DynamoDB table. In contrast, events are structured data passed to the Lambda function containing details about what triggered it. We also implemented a practical example to demonstrate how a single Lambda function can handle multiple triggers: An S3 trigger processed uploaded files by extracting metadata and saving it to DynamoDB.A DynamoDB Streams trigger sent notifications via SNS when new metadata was added to the table. This example illustrated the flexibility of Lambda’s event-driven architecture and how it integrates seamlessly with AWS services to automate workflows. In the next episode, we’ll discuss Best practices for Optimizing AWS Lambda Functions, optimizing performance, handling errors effectively, and securing your Lambda functions. Stay tuned to continue enhancing your serverless expertise!

              10/01/2025

              38

              Bao Dang D. Q.

              Knowledge

              +0

                Triggers and Events: How AWS Lambda Connects with the World

                10/01/2025

                38

                Bao Dang D. Q.

                Customize software background

                Want to customize a software for your business?

                Meet with us! Schedule a meeting with us!